Seven Prints Later
Draft · September 9, 2026
I needed a small plastic cap for my weight rack. A square top, a hollow body, two cutouts, and a couple of ribs to hold it in place. Nothing particularly exciting. But it turned into an interesting experiment: could I get GPT-6 Astra to design the replacement instead of doing the CAD work myself?
I took photos of the original, measured it, and started a conversation in Codex. I chose PLA as the material for the prints. Seven physical prints later, I had a working piece.
I'd previously used a coding assistant to help with academic research. This time, I wanted to see how far I could get with something I could actually hold in my hand.
Starting with a warped piece of plastic
My first description was a collection of measurements: 50 by 50 mm at the top, roughly 18.5 mm tall, 40 mm across the hollow inside, and 19.5 mm openings on two sides. I called the retaining ribs the “things going out.” So, not exactly an engineering specification.
These photos and my measurements were enough to get started.
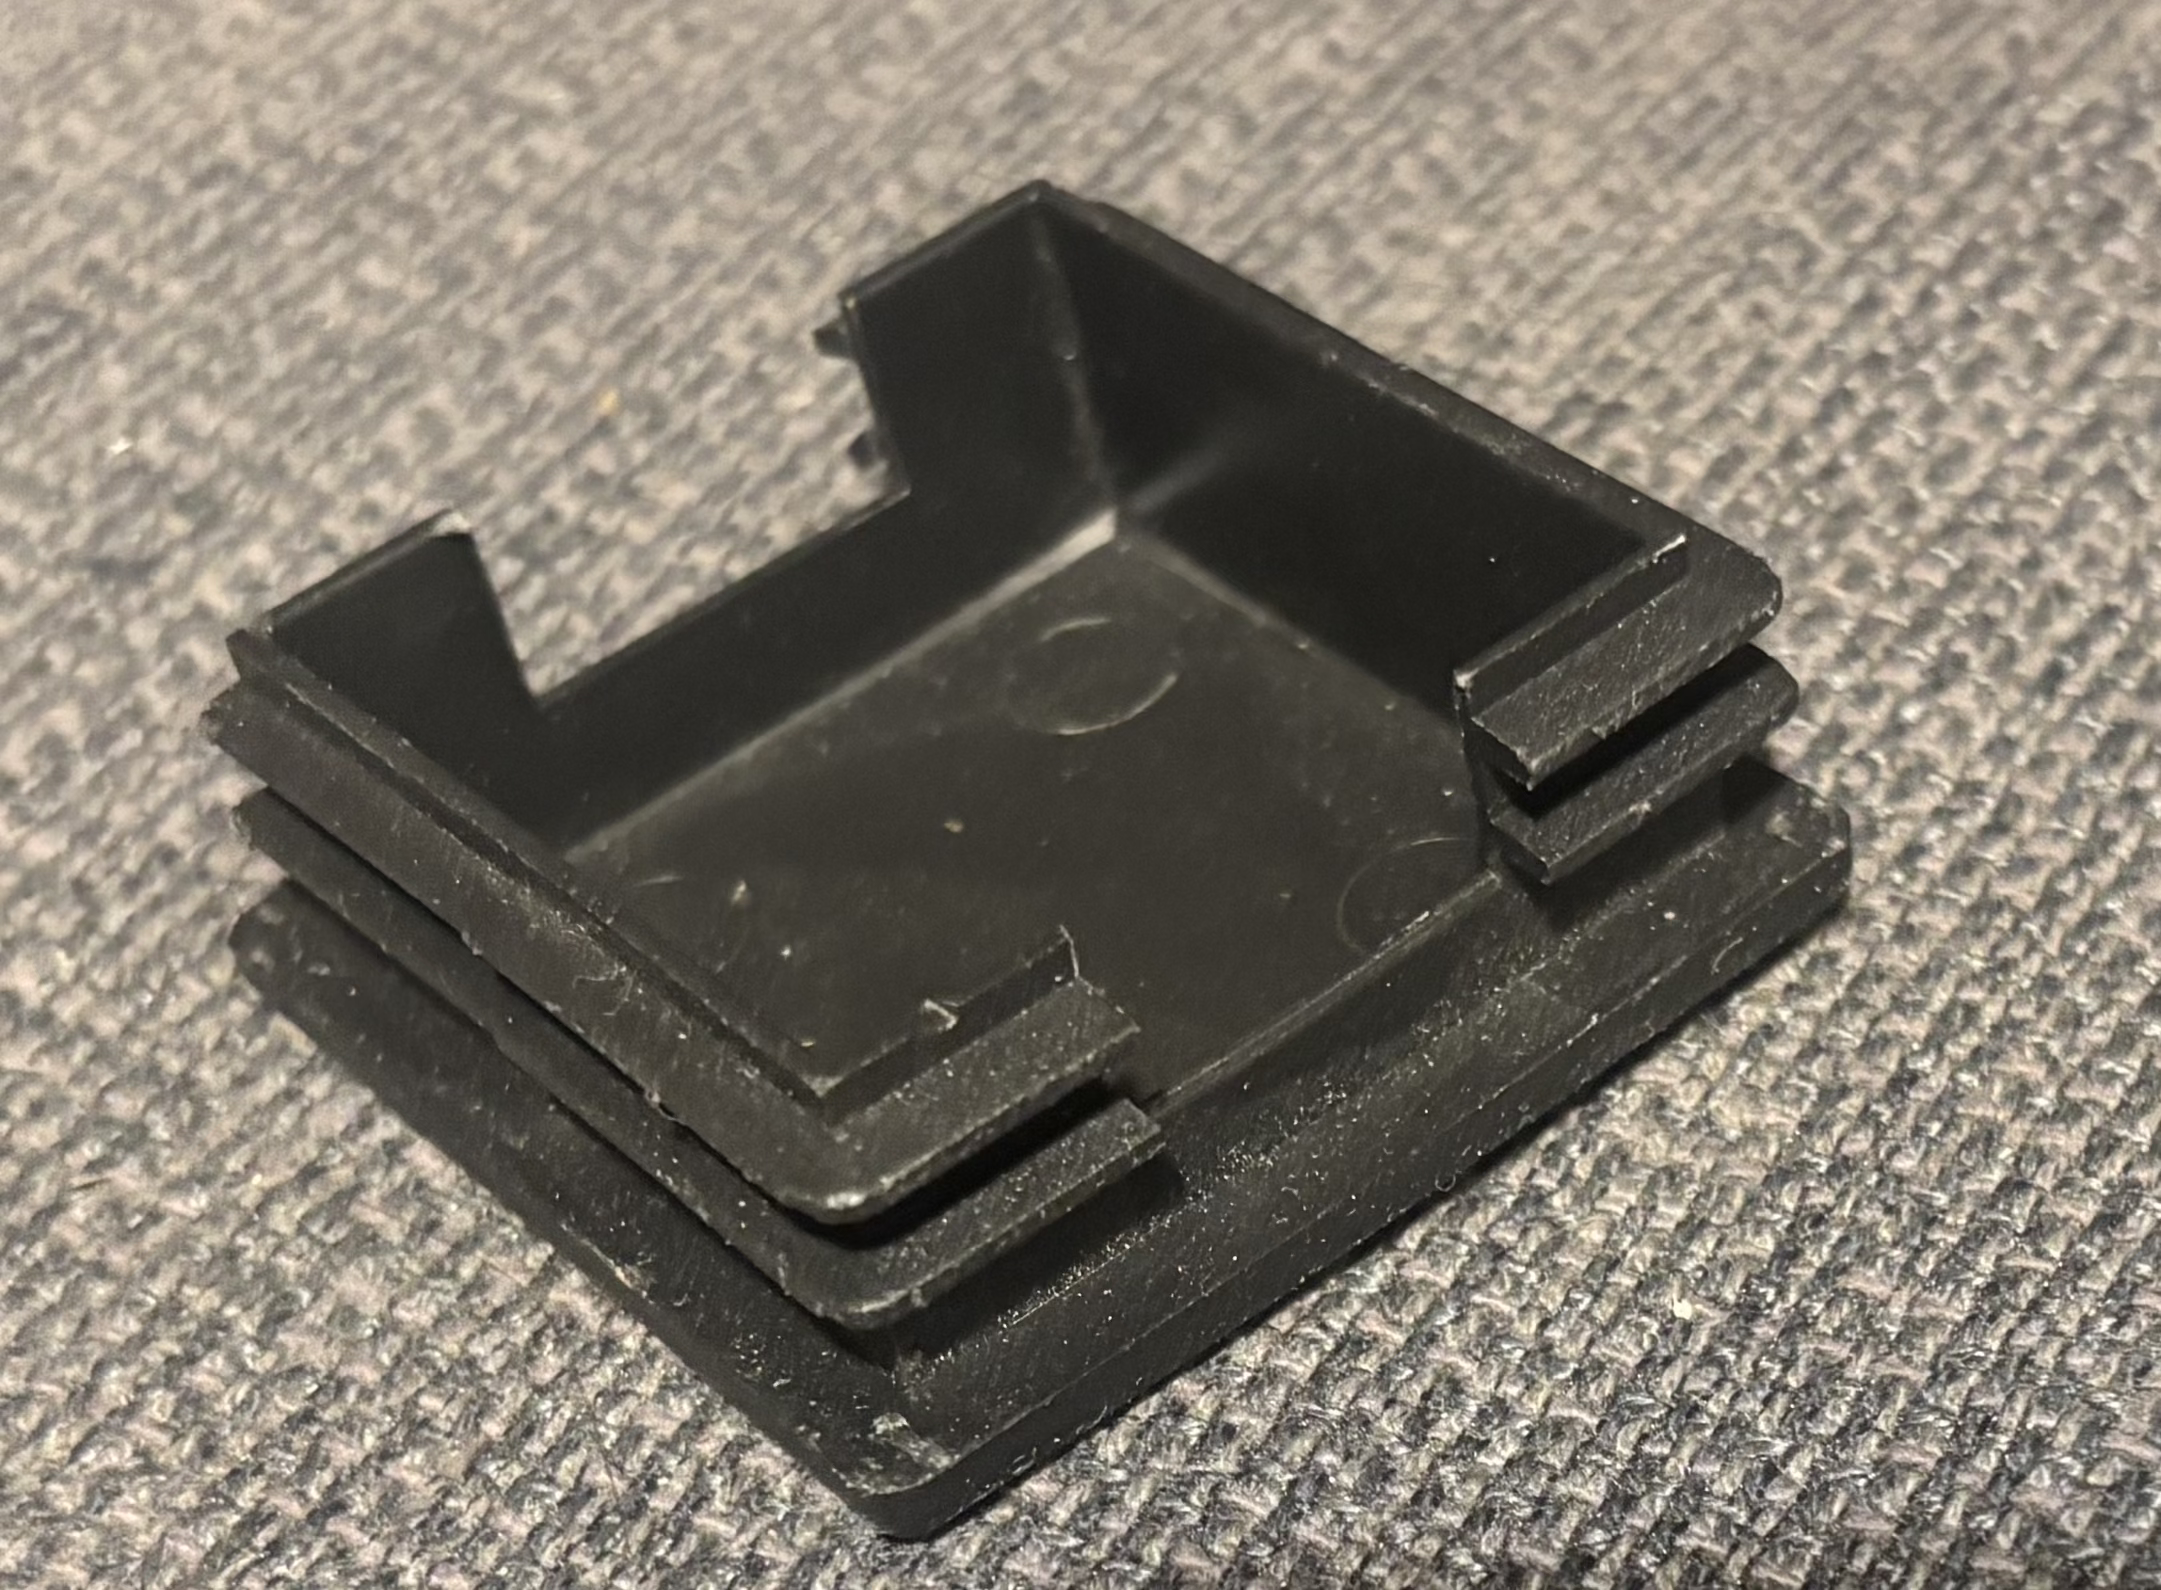
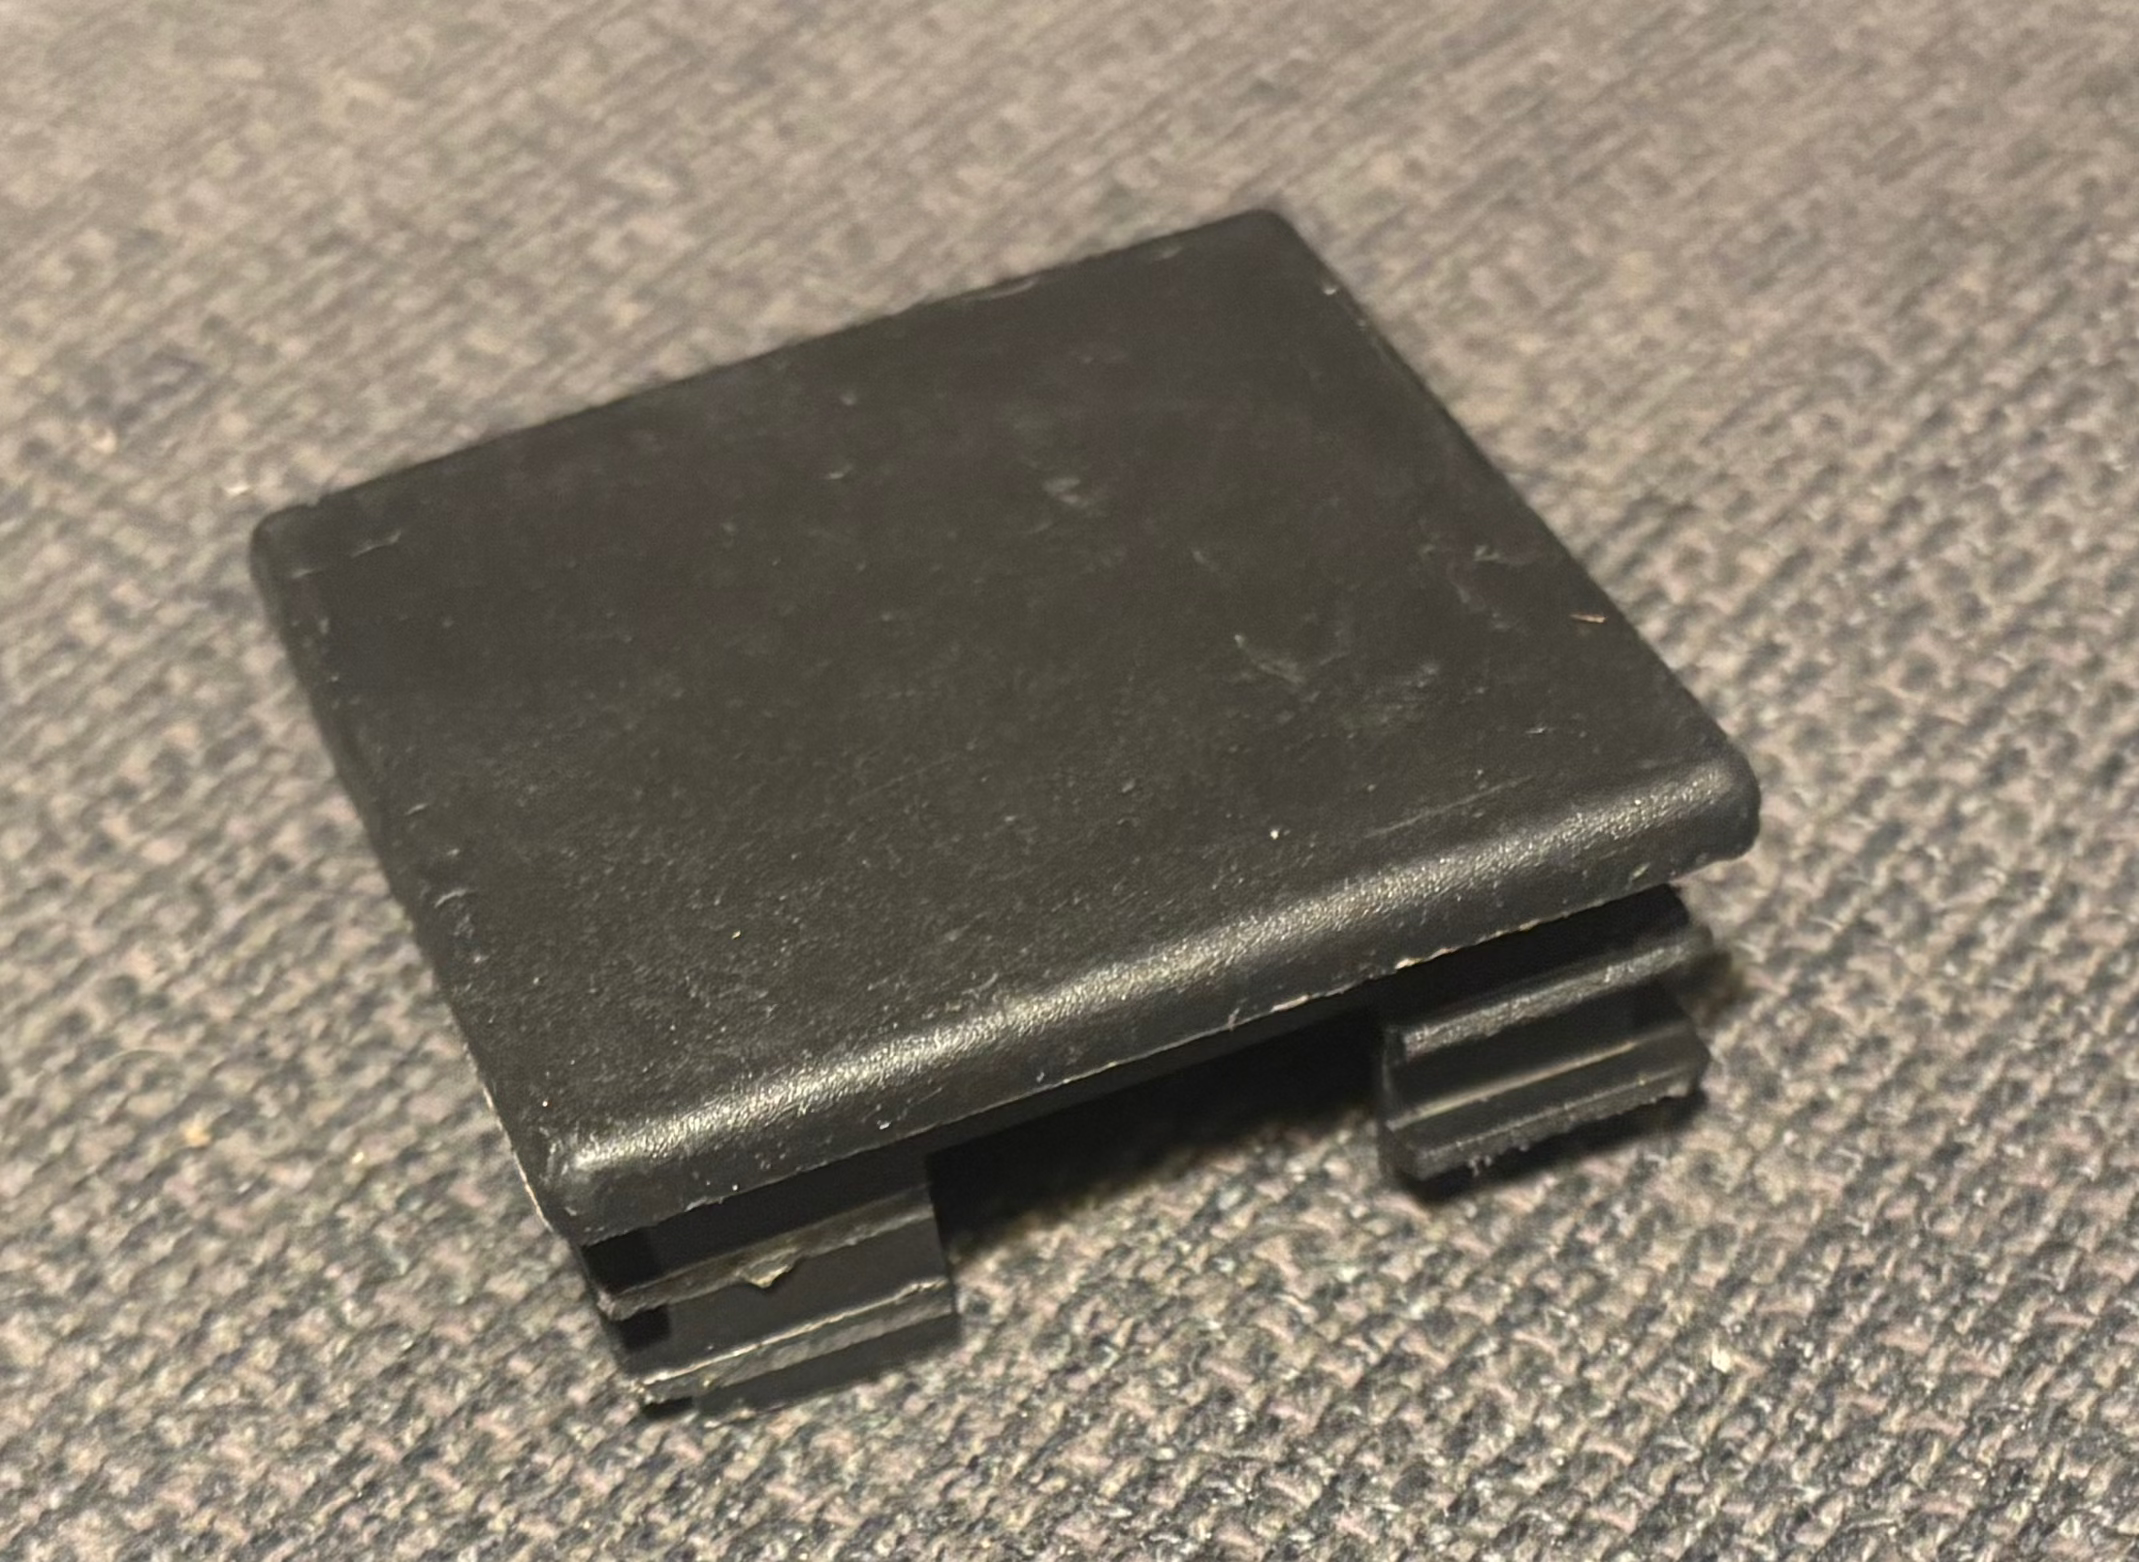
GPT-6 Astra asked a few useful questions. Did the 6.5 mm gap start at the outside of the cap or its underside? How thick was the cap? Where did the cutouts begin? I supplied what I could and told it to make reasonable assumptions. The original plastic seemed a bit warped, which didn't make the measurements easier. I also corrected the wall thickness to 1 mm.
It created an editable FreeCAD model and exported files I could load into Bambu Studio. It also generated previews and dimension drawings. This was useful: I could look at the shape, point out what seemed wrong, and get an updated model without making every CAD edit myself.
Then I printed it
The first print failed miserably. I hadn't enabled supports in Bambu Studio. A fairly basic thing to check before pressing print, which I hadn't done.
For the second print, I enabled supports. This time, I had a part I could properly compare with the original. Only then did I check a few things I should have checked before either print: the cap thickness, the overall dimensions, and the size of the hole it needed to fit into.
I'd messed up the cap thickness: it needed to be 4 mm, not the 1.5 mm I'd estimated. The PLA I was using was also much stiffer than the original plastic, so matching the old part's dimensions didn't guarantee a good fit.
So, two prints wasted. Enabling supports fixed my first mistake, but I should also have checked the measurements before starting again. Having a printable file was apparently enough to make me skip a few fairly obvious checks.
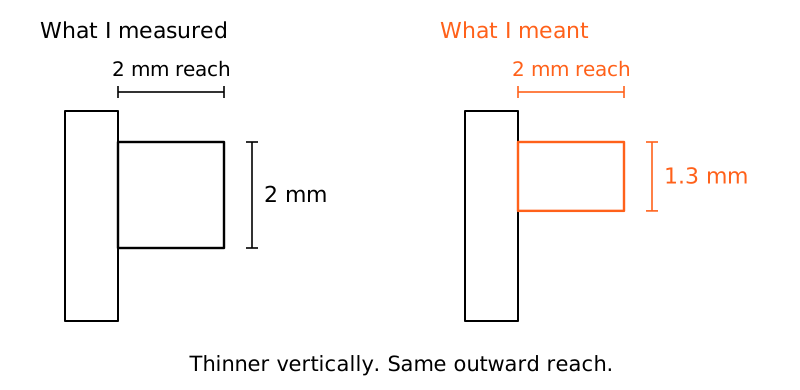
There was a misunderstanding along the way, too. I sent a photo of the prototype next to the original and said the ribs were too thick. GPT-6 Astra reduced how far they stuck out. I meant their thickness in the other direction. I had to be more specific:
"The thickness should go from 2 mm to 1.3 mm, but the amount of width (how much it stands out) should stay the same as it was before."
— My correction in the conversation
It fixed the model. This was a good reminder that even when both sides use the same word, they can be talking about different dimensions. An arrow on a drawing would probably have helped.
A nicer edge
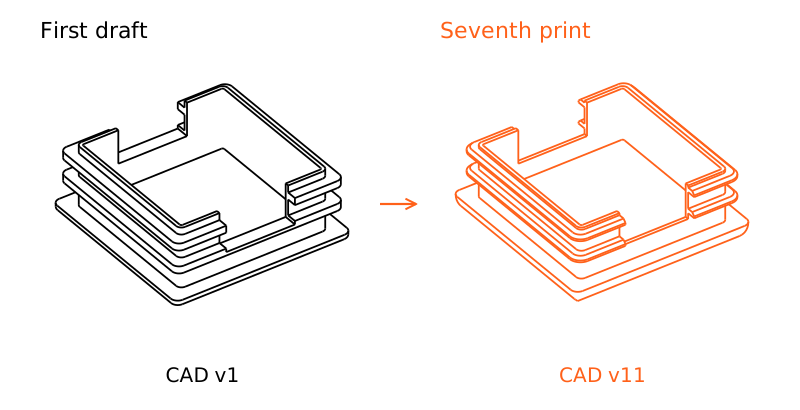
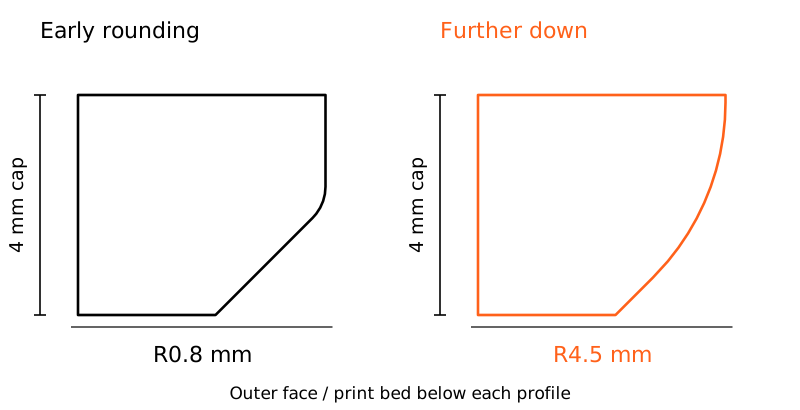
Once we had the basic shape, I also wanted the top to look and print better. I'd seen a video about 3D printing that suggested combining a chamfer with a fillet. First make the diagonal edge, then round its transition into the side.
I asked GPT-6 Astra to apply that to our cap. Then I asked it to make the rounding more pronounced and start earlier. Then further down again. It took a few versions to get the shape I had in mind. The final profile used a 2 mm chamfer and a 4.5 mm fillet radius, while keeping the cap itself 4 mm thick.
Being able to say “further down” and compare the next drawing was convenient. I didn't need to know the right radius in advance. I could decide whether I liked the result once I saw it.
Getting it to stay in
The fit took the most back and forth. With 46 mm across the ribs, the part was too loose. I asked for an extra 1.5 mm in total, adding 0.75 mm on each side. We overcorrected. At 47.5 mm, it wouldn't go in.
We reduced it to 46.5 mm, and it fell out again. At 46.8 mm, it fit, but it was still very easy to remove. By that point, it was clear we didn't have much room left for another increase.
For the final adjustment, we added just 0.05 mm per side, bringing the total to 46.9 mm. We also changed the rib profile: a 0.8 mm sloped lead-in on the side that enters the rack first, with a flat shoulder toward the cap. The overall rib thickness stayed at 1.3 mm.
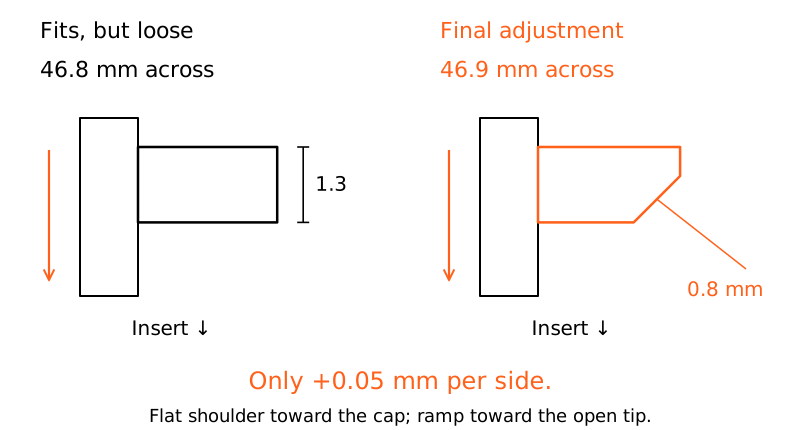
That was CAD v11 and my seventh physical print. It worked. There were more files than prints because some changes happened while we were still looking at the model. I didn't print every version.
What I liked about this
I liked that a crude description of the measurements and my rather lousy photos were enough to get started.
GPT-6 Astra handled the modeling, the exports, and the drawings. I handled the measurements, the printer, and the fit tests. Each print gave us something concrete to discuss. Too thick. Too loose. Doesn't go in. Start the rounding lower.
I also liked that GPT-6 Astra always provided images showing exactly what it had changed, like the comparisons above. That made it easy to check each update and give the next bit of feedback.
My measurements were imperfect, and the assistant misunderstood me at least once. A valid CAD file could still produce a part that fell out of the rack. The physical feedback was essential, and seven prints is a fair amount of iteration for a small piece of plastic.
Still, I liked being able to work this way. I could describe what I wanted, look at the result, and keep refining it. The detailed CAD work happened in the background while I focused on whether the piece did its job.
What I could have done better
I was too quick to hit print. I should have measured both the original part and the rack opening more carefully, compared those measurements with the model, and checked the support settings before starting. Marking up a photo would also have made it clearer which dimension I meant by “thickness.” I still would have needed to test the fit, especially with the stiffer PLA, but a bit more care upfront could have saved me a few iterations.
About this post
This post was entirely written by GPT-6 Astra, based on our conversation about the project. I asked it to sum up my experience, then read the initial draft and requested a few corrections. GPT-6 Astra made those edits, too.